Printing from SD Card
|
|
Outdated: This page is no longer an accurate representation of the current version of MatterControl and needs to be updated. |
Overview
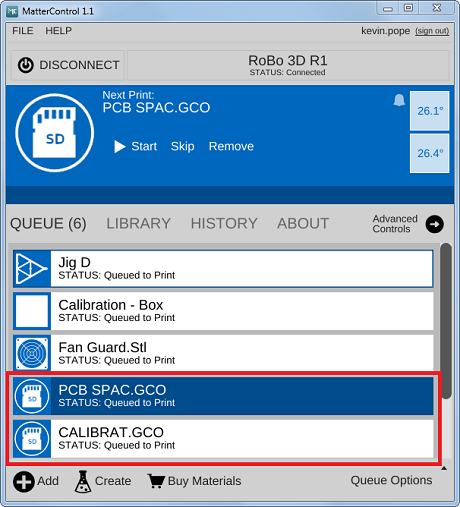
Files present on an SD Card inserted in a printer with an SD slot and connected to MatterControl show up in the normal Queue and can be printed, paused, and canceled in the same as any other print.
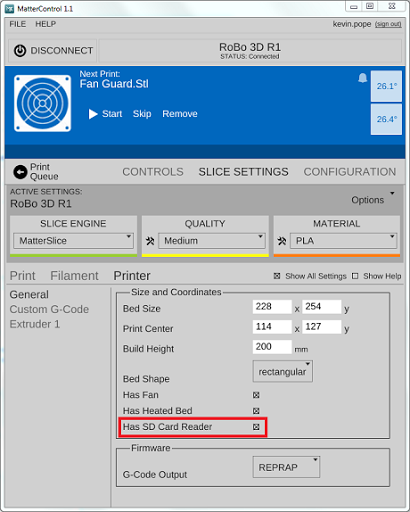
If your printer has an SD Card be sure to enable it in the slice settings (see picture below) and let us know if you have suggestions for improving this feature.
Please Note: Models can no longer be exported directly from the Print Queue to an SD card inserted in the printer's SD port. The SD card must be inserted the SD card slot on the computer running MatterControl. This was possible in earlier versions of MatterControl, but the feature has been removed due to complications with user interface.
Instructions
The first thing you need to make sure of is that you have SD Card Reader enabled in your settings.
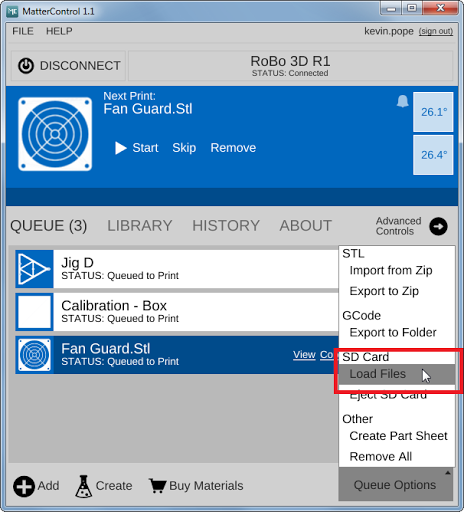
Then you can load the file from the SD card in the printer into your queue.
And print them directly.
Exporting the entire Queue
It is easy to export your entire queue to an SD card. Just follow these steps:
- Insert your SD card into the computer you are running MatterControl on.
- Add the parts you want to export to your queue
- Remove any parts you don't want to export
- Select your printer
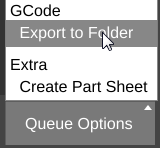
- Choose 'Export to Folder' from the 'Queue Options' menu
- Select your SD card as the destination folder
- Wait for the export to finish


