Automatic Print Leveling
Types of Bed Leveling
- None: The print bed is leveled physically/mechanically. Most printers are capable of using this method as a fallback. Usually there are adjustment screws under the bed.
- Probing / Automatic Firmware Leveling: In this case the printer is equipped with some kind of probe or sensor for measuring the height of the bed. The firmware then takes into account these measurements when executing moves. The probing sequence is activated using the
G29command in your Start GCode.- Mechanical Switch (Robo or Kossel Pro)
- Conductive (Lulzbot Mini)
- Inductive (Printrbot Simple)
- Force Sensing Resistors
- Manual Software Leveling: Has the user measure the height of the bed at various points using paper as a feeler gauge. Measurements only need to be taken once. Leveling is applied to the gcode before it is sent to the printer. MatterControl lets you choose between 3, 7 and 13 point leveling. The more points that are measured, the more accurate the leveling will be.
- 3 Point Plane: Assumes the bed is a planar surface. This is usually sufficient for cartesian printers, unless they have severely warped beds.
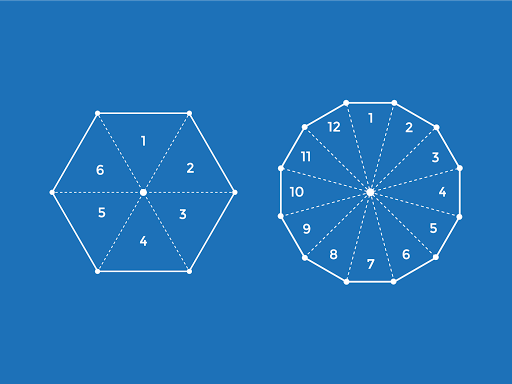
- 7 Point Disk: Approximates the shape of the bed as a cone. This is good for small or well calibrated delta printers.
- 13 Point Disk: Approximates the shape of the bed as a bowl. This is the best solutions for larger delta printers with severe calibration issues.
Probing and software leveling should not be used at the same time, since they will conflict with each other. If MatterControl 1.5 sees that you have software leveling enabled and there is still a G29 in your start gcode, it will be ignored. In future versions there will be a warning to let you know this is going on.
Software Leveling
Print Leveling allows MatterControl to figure out the tilt or angle of the bed. Using this information when printing, MatterControl actively raises and lowers the Z axis to make that the printed part matches the tilt bed and will always remain correctly above it. This process ensures that the print remains level regardless of the unevenness of the bed.
Long story short, no matter how tilted your bed is, Automatic Print Leveling will ensure that your print will match it perfectly.
How Do I Enable It?
Here is how to access Software Print Leveling feature:
- Select your printer
- Connect to your printer
- Click 'Settings & Controls'
- Click the 'Options' tab
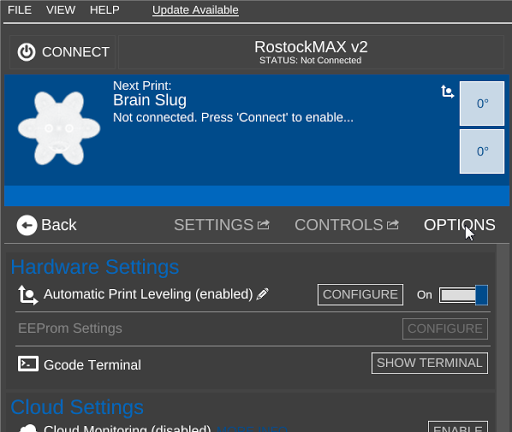
- To the right of 'Software Print Leveling' select 'Configure'
- Follow the on screen instructions
A step-by-step instruction wizard will open and walk you through the calibration process with clear, easy-to-follow instructions. The only thing you will need is a sheet of standard paper. The software will ask you to help it measure several points on your bed and when completed Print Leveling will automatically be turned on and ready to help. The whole process is very easy and will take about 3 to 5 minutes.
How Will This Affect My Printer And Prints?
Print Leveling does not directly change anything about your printer or your print files. It simply allows for the correction of an uneven bed to be compensated for during printing. If for some reason your bed gets uneven, Print Leveling can compensate for it by adjusting the Z axis as you print. This should work for all source files that your printer can use.
Settings
Most of the print leveling settings can be found in Settings > Printer > Print Leveling
Leveling Solution
The 3-point kind of software leveling works great on Cartesian style printers, but it doesn’t work particularly well on Delta style printers like the SeeMeCNC Rostock Max V2 and Orion.
Delta printers are great, but they’ve been known to be a bit more difficult to calibrate and level. Our goal is to make MatterControl “just work” with every kind of printer. So, the new 7 and 13 point leveling options were designed specifically to address the calibration issues with deltas.
Essentially, the 7 and 13 point leveling options break your printer bed up into either 6 or 12 separate, smaller planes.
Because deltas have three independent towers, with three independent sets of delta arms, it’s possible for one area of the bed to be different than another. The area between the X tower and Y tower, for example, may be higher off the bed than the area between the X and Z towers, or the Y and Z towers. This can’t be properly accounted for with just one plane.
The 7 and 13 point leveling allows MatterControl to account for this and provide a level printing surface through software. While the 3 point plane is generally adequate for Cartesian printers, there’s no reason you can’t use the 7 or 13 for added precision.
Require Leveling To Print
This is a safety feature that prevents MatterControl from starting a print unless software leveling is setup for your printer.
Manual Probe Paper Width
This allows you to define the width of the paper or other feeler gauge you are using when measuring points on the bed.
Settings > Printer > Features > Has Hardware Leveling
This check box tells MatterControl whether or not your printer has a probe or other means of doing leveling on its own. If this is the case, MatterControl will hide the option for running the software leveling wizard. Clicking this check box will *not* add a G29 command to your start gcode
Tips for setting up your printer
Mechanical Changes:
Automatic Print Leveling works better if your limit switch is on the top (Zmax). We’ve gotten it to work on printers with the z switch on the bottom (Zmin), but it’s a little tricky.
G-Code Changes:
If the limit switch is on the bottom (printer homes to the bed). Add the following G-code after homing.
G1 Z1 ; raise the extruder to be 1 millimeters above the bed.
This code will help prevent the extruder from bumping into the build plate when it first starts moving.
Firmware Changes:
It is also important that the `ZJERK` (at least in marline firmware) not be 0. If it is 0 it will cause the printer to have to come to a complete stop at every change in z, which will be every move. In Marlin firmware you can find this in Configuration.h line 195 (or there about). We set it to .2.
#define DEFAULT_ZJERK 0.2 // (mm/sec) can't be set to 0 for bed leveling to work.
Or add the following to your start G-Code:
M205 Z.2

